After adding a merchant to your account and some demo products, you just add a snippet to your website and you are ready to go.
Available as a video tutorial

Step 1: Adding a Merchant
First, create an account with Minimal Webshop. You will then be guided through an onboarding wizard, which will help you establish your shop in three simple steps.
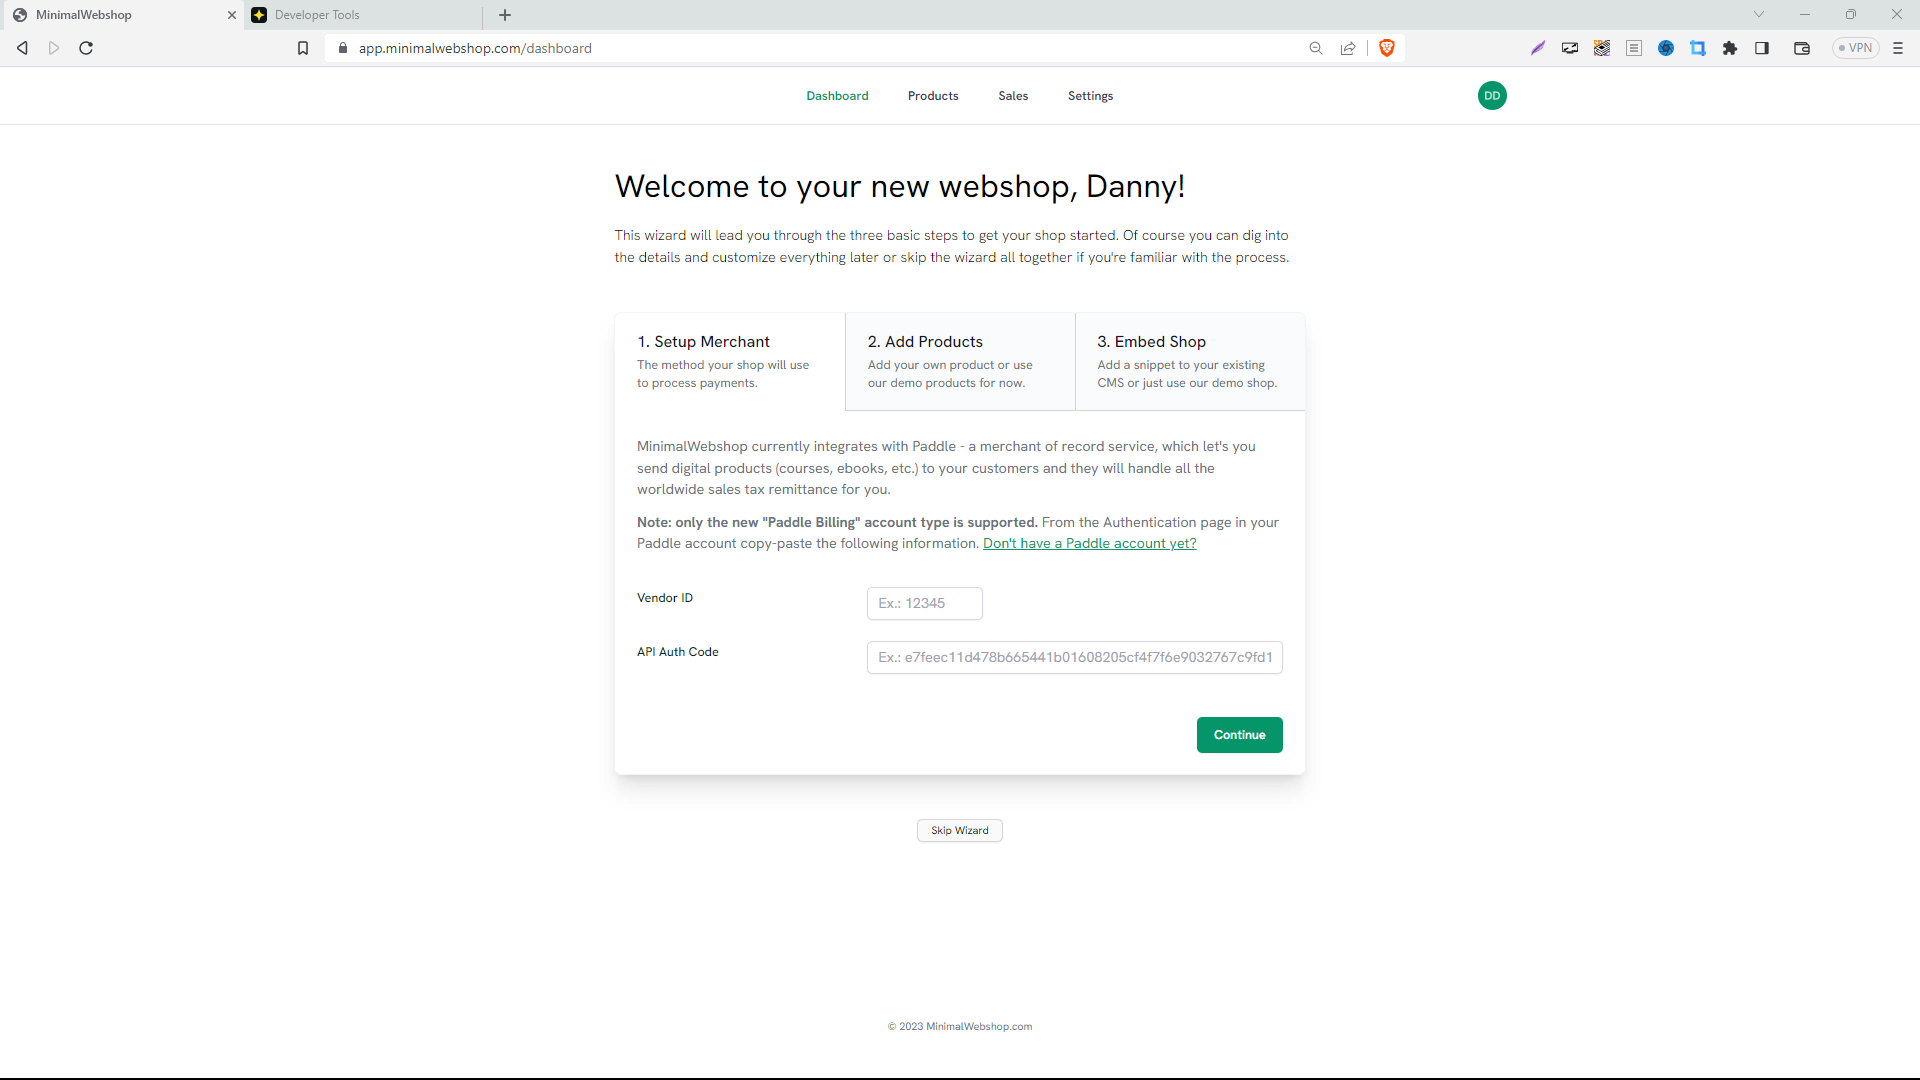
The initial step is adding a merchant. For this guide, we use Paddle, a popular online payment platform that acts as your Merchant of Record and handles all your worldwide tax emittance obligations for you. We have an accompanying tutorial that will guide you through the process of setting up a Paddle sandbox account to get you started. .
The Sandbox account enables you to set up your store, add your products and preview how it looks on your website without the need for a production Paddle account.
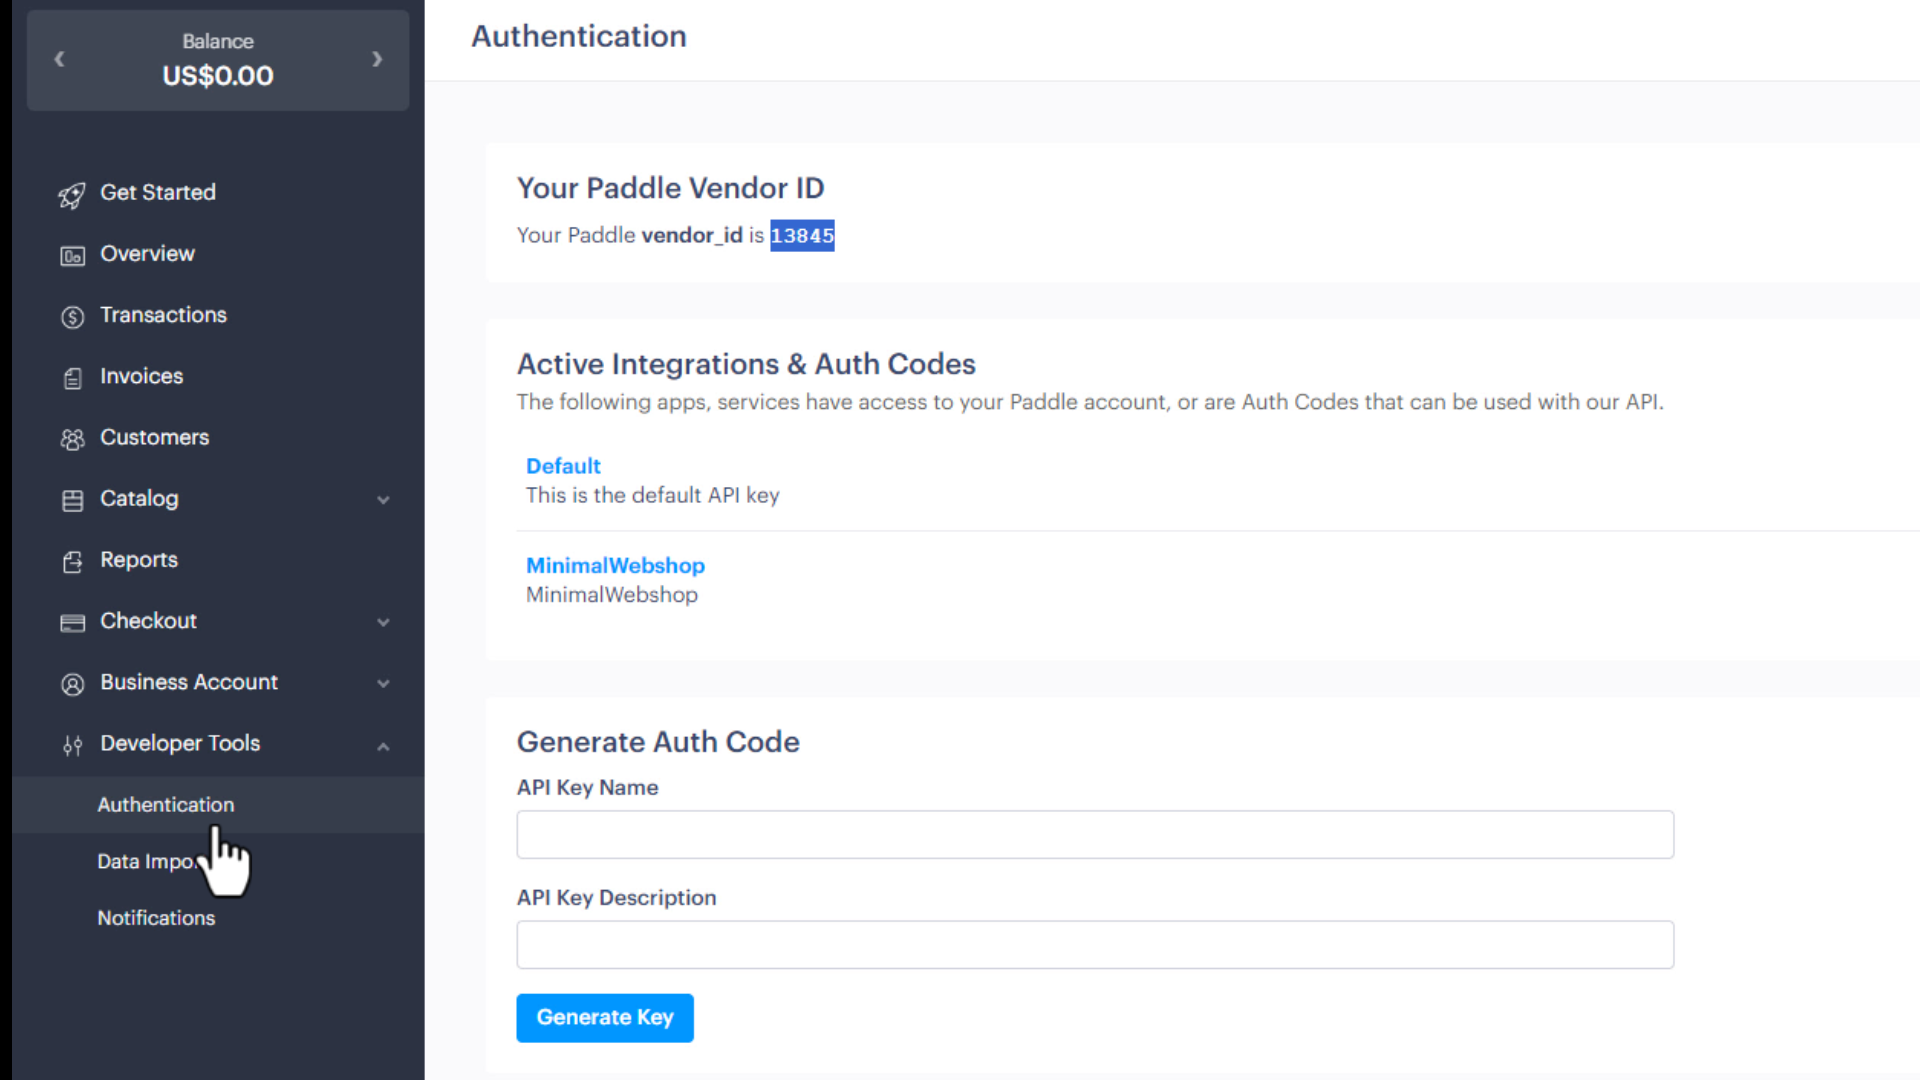
Once your Paddle account is established, navigate to Developer Tools > Authentication to retrieve your vendor ID and API authcode. You will use these two pieces of information in the MinimalWebshop wizard.
Note: Although you can use the default API Authcode provided by Paddle, for the purpose of this tutorial, we've created a separate one.
Copy paste the information in the two fields in the MinimalWebshop wizard, then click "Continue". Minimal Webshop will establish a connection with Paddle and set everything up for you.
Step 2: Adding Products
Once your merchant is set up, the next step is to add some products to your shop. As part of this demo you can let the wizard create 3 test products for you. You can delete these products later, but they make the initial setup process more comfortable and faster.
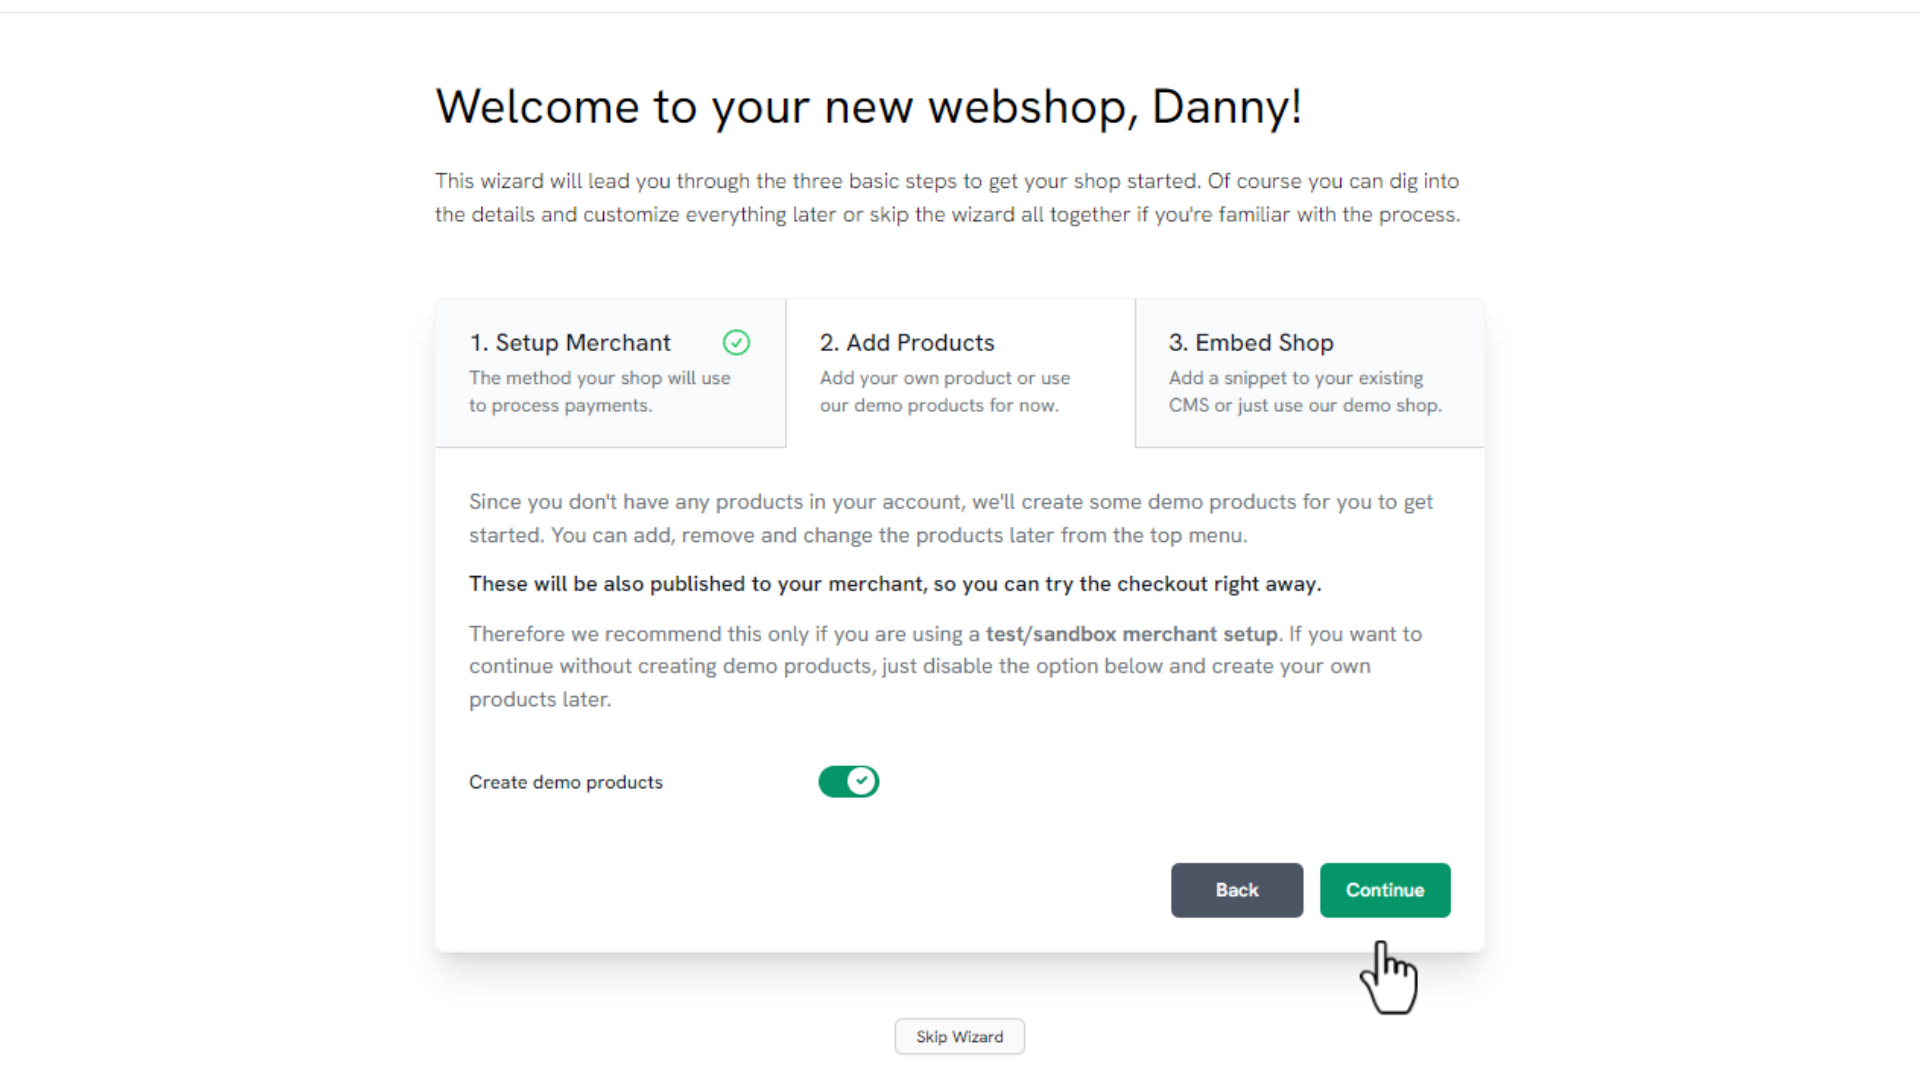
While you continue with the setup, these products synchronize with Paddle in the background. You will find them in the products section of your Minimal Webshop.
Note: You will be able to test your checkout process with a test credit card once this wizard is completed.
Step 3: Embedding your Webshop
The last stage of the setup is integrating your newly created shop into your website. In this guide, we use Carrd, a popular website builder, for our demo website, but we have guides for adding the webshop to many popular CMS.
The basic steps to integrate the shop into a website are:
Copy the snippet from Minimal Webshop in the onboarding wizard.
Add a new
Embedelement (sometimes called an HTML or Javascript widget) to your website.Paste the snippet into the element's properties field under
Code.
Although you won't see your webshop in the preview, once you publish your website, you will find the newly integrated Minimal Webshop added to your website.
Important Final Step: Adding your Webshop URL to Paddle's Checkout Process
Copy the URL of your webshop from the browser and switch back to your Paddle account. Under Checkout settings find the textbox labelled "Default Payment Link" and add your webshop's domain (or subdomain).
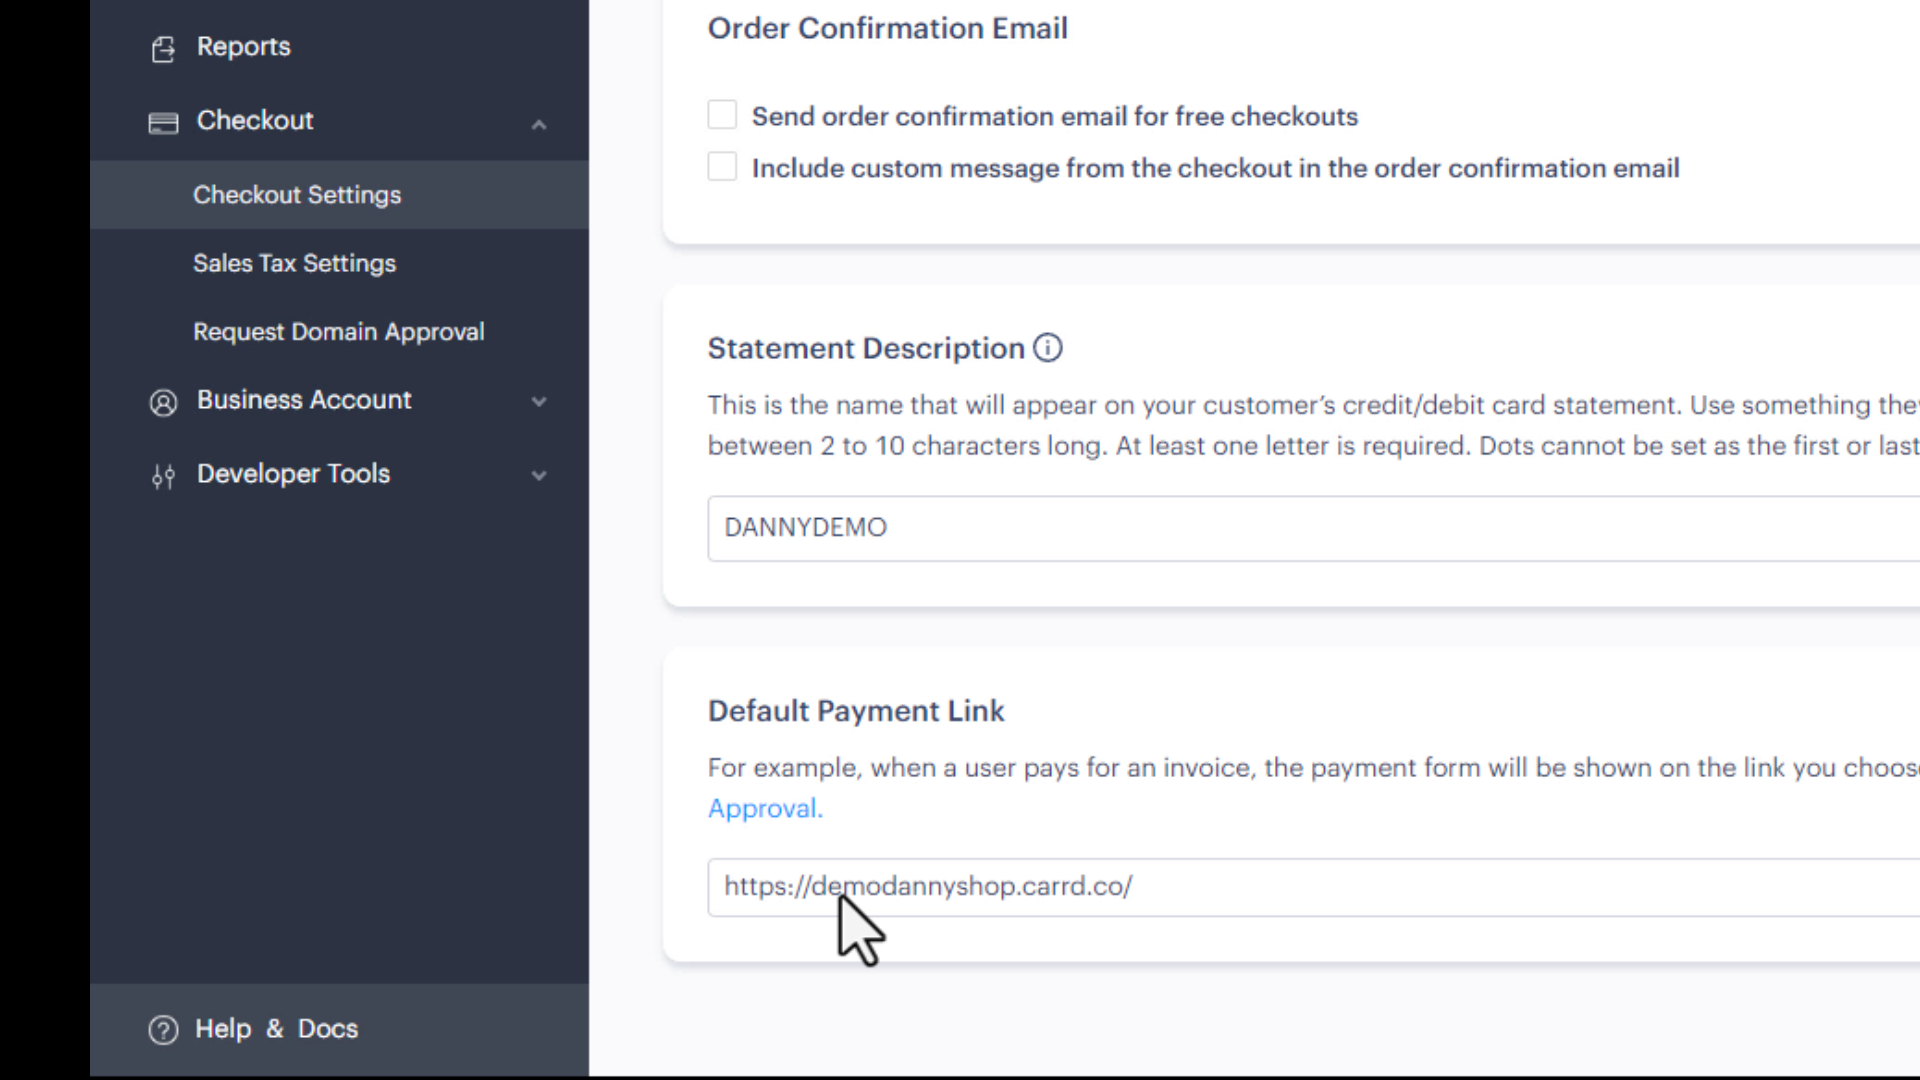
Note: Make sure the link points directly to the page where your webshop is hosted. That is the page where you embedded the Minimal Webshop widget.
If the domain differs from the one used during registration, you must also request domain approval in Paddle under "Request Domain Approval" but only for your production Paddle account - it is not necessary for a sandbox account.
Now, your Paddle account is ready to perform a checkout process. Go to your webshop, add a product to the cart and click "Checkout". The Paddle Checkout will open and you can use the following test credit cards to complete a purchase.
Card Number: 4000 0566 5566 5556
Expiry: Any future date
CVC: Any 3 digits
Name: Any name
Complete the checkout and you will get an email to your provided email address with a link to the customer portal. You can also click "Customer Login" and provide your email address to receive a code and access all purchases registered to your account that way.
Next step: Read our guide on using MinimalWebshop to add/update products and customize your shop.